There were earlier posts where we discussed External Content Types setup for SharePoint 2010:
Setting up External Content Type for SQL Server database using SQL Server authentication - SharePoint 2010 Foundation
External Content Types - Reload - Setting up for SQL Server database using SQL Server authentication - SharePoint 2010 Server
This one is about creating connection to the custom SQL Server database (External System) in SharePoint 2013.
1. Create Secure Store Service Target Application
1.1. Go to Central Administration -> Manage Service Applications -> Secure Store Service Application. Click "Generate New Key" if required:
1.3. Create "New" to create new Target Application:
1.6. Specify Administrators:
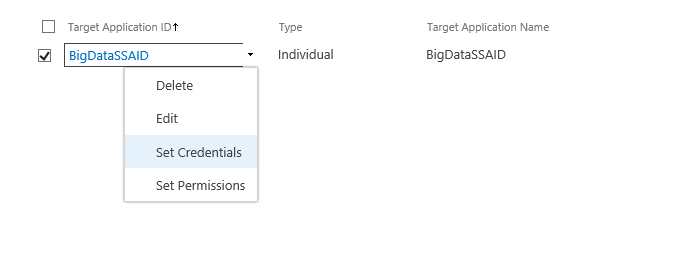
1.7. Set credentials for the newly created Secure Store Target Application:
Now we are ready to create new External Content Type to work with custom external data.
2. Creating External Content Type using SharePoint Designer 2013
2.1. Open SharePoint Designer -> Open Site -> External Content Types -> New External Content Type:
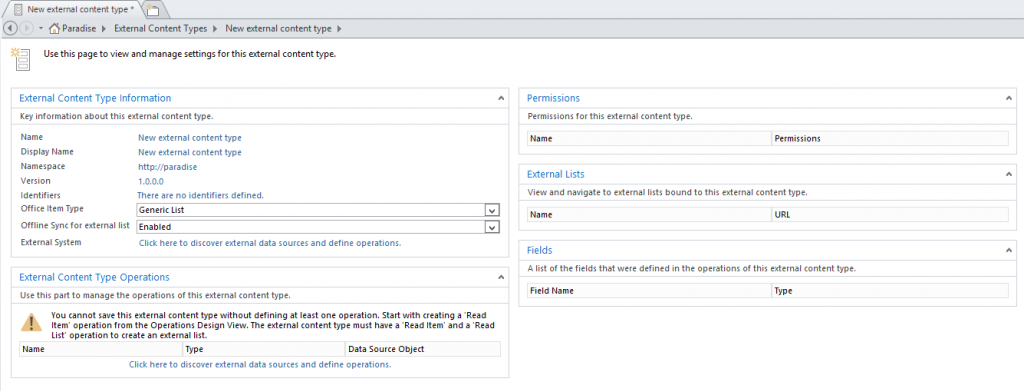
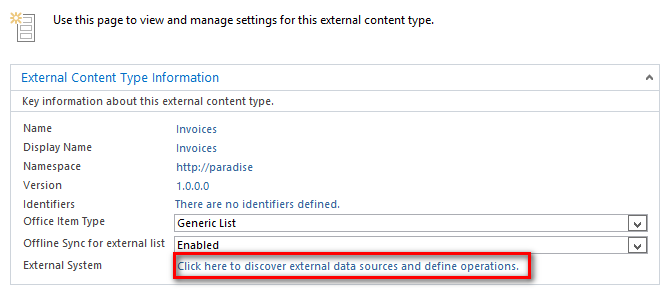
2.2. Provide the name and click External System link to specify external data parameters:
2.3. Click "Add Connection" button:
2.4. The choices are "SQL Server", "WCF Service" and "NET. Type":
We are selecting "SQL Server" in our case.
2.5. Specify data connection properties. Select "Connect with Impersonated Custom Identity" and provide the name of Secure Store Target Application name that was created earlier:
2.6. Specify the table, view or stored procedure that will be used in External Content Type and generate the necessary actions:
2.6.1.
2.6.2.
2.6.3. Select the field which will be used as identifier:
2.6.4. Specify filters if required:
2.6.5. Done:
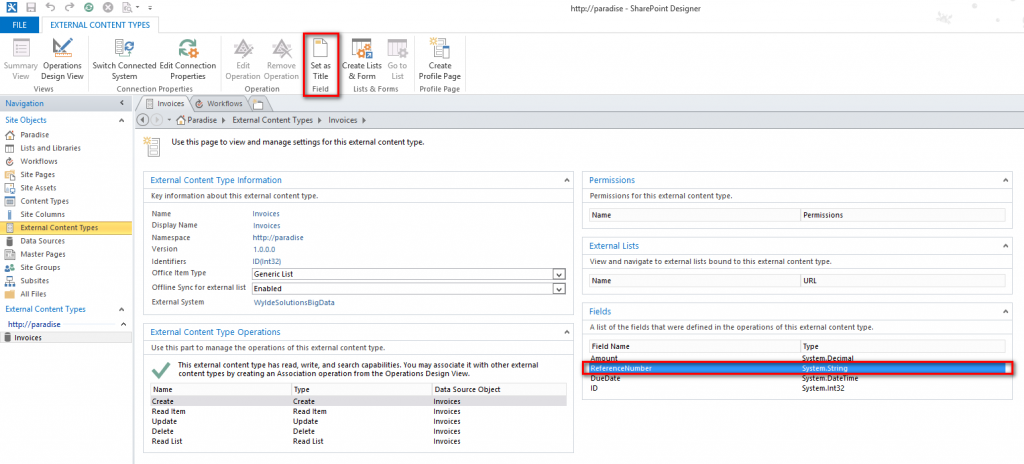
2.7. Set the Title:
2.8. Set up permissions to manage and execute External Content Type. Go to Central Administration -> Manage Service Applications -> Business Connectivity Service Application:
2.9. Select the newly created External Content Type and click "Set Object Permissions" button for individual object or click "Set Metadata Store Permissions" to apply permissions to all objects:
Note: In order to use External Content Type in SharePoint as end user the "Execute" and "Selectable In Clients" permissions level is enough.
Now we are ready to use the new External Content Type on our SharePoint site.
3. Create an External List if necessary.
3.1. Select External Content Type in SharePoint Designer and click "Create Lists & Form" button:
3.2. Specify the list name and select an option to create InfoPath Form if necessary:
Done.
Stay tuned for more fun with SharePoint 2013.
Setting up External Content Type for SQL Server database using SQL Server authentication - SharePoint 2010 Foundation
External Content Types - Reload - Setting up for SQL Server database using SQL Server authentication - SharePoint 2010 Server
This one is about creating connection to the custom SQL Server database (External System) in SharePoint 2013.
1. Create Secure Store Service Target Application
1.1. Go to Central Administration -> Manage Service Applications -> Secure Store Service Application. Click "Generate New Key" if required:
1.2. Provide Pass Phrase:
1.4. Provide the name and other parameters and click "Next":
Note: It's good idea to specify "Group" for Target Application Type. In that case you would be able to manage access to the external data using Active Directory groups rather that individual user accounts.
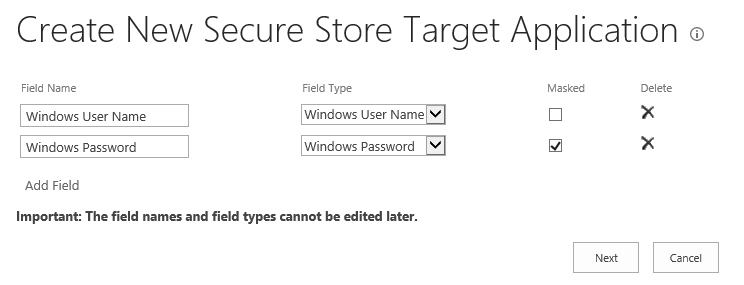
1.5. Provide fields that are going to be used in this Secure Store Target Application. In my case it is just Windows User Name and Password fields:
1.7. Set credentials for the newly created Secure Store Target Application:
Now we are ready to create new External Content Type to work with custom external data.
2. Creating External Content Type using SharePoint Designer 2013
2.1. Open SharePoint Designer -> Open Site -> External Content Types -> New External Content Type:
2.2. Provide the name and click External System link to specify external data parameters:
2.3. Click "Add Connection" button:
2.4. The choices are "SQL Server", "WCF Service" and "NET. Type":
We are selecting "SQL Server" in our case.
2.5. Specify data connection properties. Select "Connect with Impersonated Custom Identity" and provide the name of Secure Store Target Application name that was created earlier:
2.6. Specify the table, view or stored procedure that will be used in External Content Type and generate the necessary actions:
2.6.1.
2.6.2.
2.6.3. Select the field which will be used as identifier:
2.6.4. Specify filters if required:
2.6.5. Done:
2.7. Set the Title:
2.8. Set up permissions to manage and execute External Content Type. Go to Central Administration -> Manage Service Applications -> Business Connectivity Service Application:
2.9. Select the newly created External Content Type and click "Set Object Permissions" button for individual object or click "Set Metadata Store Permissions" to apply permissions to all objects:
Note: In order to use External Content Type in SharePoint as end user the "Execute" and "Selectable In Clients" permissions level is enough.
Now we are ready to use the new External Content Type on our SharePoint site.
3. Create an External List if necessary.
3.1. Select External Content Type in SharePoint Designer and click "Create Lists & Form" button:
3.2. Specify the list name and select an option to create InfoPath Form if necessary:
Done.
Stay tuned for more fun with SharePoint 2013.









Thank you for the information. You have a very good article. I found it informative and useful. Keep up the good work and God bless!
ReplyDeleteCaren
www.gofastek.com
I like what you guys are up too. Such intelligent work and reporting!Keep up the excellent works guys I have incorporated
ReplyDeletesharepoint online training
Good article on SharePoint External Content Types setup, exclude the usefulness images in between then content looks more interesting to the audience.
ReplyDeleteBest Regards,
SharePoint 2013 Online Training in Hyderabad