Scenario
We want to expose some SharePoint data as a directed output for the search. Users will be able to search that data specifically.
Solution
Create a custom search scope.
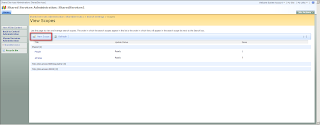
1. Go to Shared Service Provider settings -> Search Settings -> Scopes section. Click View scopes link:

2. Click New Scope button from the actions menu:
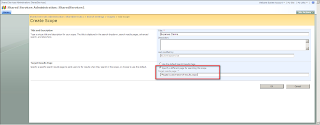
3. Provide name and search results page for the new search scope. In my case it is "Expense Claims" and "/Pages/customsearchresults.aspx" respectively - I will use the forms library created in this post and search results page created in that post:
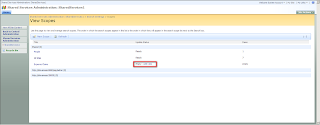
4. In the Search scopes list click Add rules link for the newly created scope:
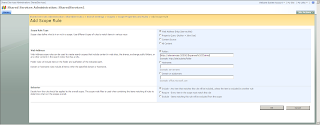
5. In the Scope Rule Type section select Web Address option, in Web Address section select Folder option and provide folder URL - in my case it is "http://your_server_name/Expense%20Claims" - and press OK button:
6. At this stage your new search scope will be empty and you have to wait some time until it will be updated by the system:

or click the "Start update now" button from the Shared Service Provider settings -> Search Settings -> Scopes section
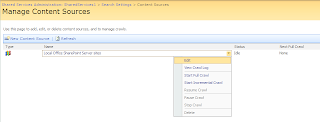
7. Go to Shared Service Provider settings -> Search Settings -> Content Sources and for the main content source select Edit item from the actions menu:
8. In the Start Address section add the following string: "sps3://your_server_name" if it's not there:

I had to do this, because otherwise I had nothing in my search index when I crawled the content source.
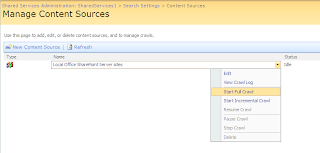
9. Run the full crawl in order to populate your newly created search scope:
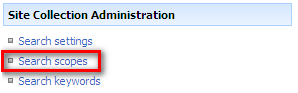
10. When crawling is finished go to the Web site where you are going to expose your new search scope. On that Web site go to Site Settings -> Site Collection Administration -> Search Scopes:
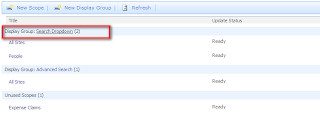
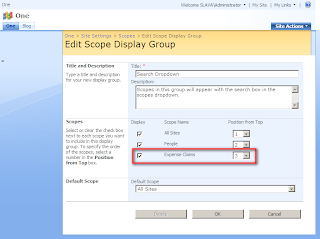
11. Select "Display Group: Search Dropdown":
12. In the Scopes section of the Edit Scope Display Group tick the checkbox for the created scope and choose the position for this scope in the search dropdown. Press OK:
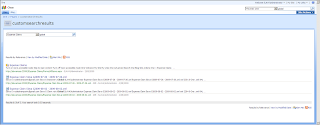
13. To test the work go to your custom search page, select the created scope in the search dropdown and try to search some data. Mine worked:
Enjoy. :)
Stay tuned for more: search results customization, custom managed properties and custom metadata property mappings for search.
We want to expose some SharePoint data as a directed output for the search. Users will be able to search that data specifically.
Solution
Create a custom search scope.
1. Go to Shared Service Provider settings -> Search Settings -> Scopes section. Click View scopes link:

2. Click New Scope button from the actions menu:

3. Provide name and search results page for the new search scope. In my case it is "Expense Claims" and "/Pages/customsearchresults.aspx" respectively - I will use the forms library created in this post and search results page created in that post:

4. In the Search scopes list click Add rules link for the newly created scope:

5. In the Scope Rule Type section select Web Address option, in Web Address section select Folder option and provide folder URL - in my case it is "http://your_server_name/Expense%20Claims" - and press OK button:

6. At this stage your new search scope will be empty and you have to wait some time until it will be updated by the system:

or click the "Start update now" button from the Shared Service Provider settings -> Search Settings -> Scopes section
7. Go to Shared Service Provider settings -> Search Settings -> Content Sources and for the main content source select Edit item from the actions menu:

8. In the Start Address section add the following string: "sps3://your_server_name" if it's not there:

I had to do this, because otherwise I had nothing in my search index when I crawled the content source.
9. Run the full crawl in order to populate your newly created search scope:

10. When crawling is finished go to the Web site where you are going to expose your new search scope. On that Web site go to Site Settings -> Site Collection Administration -> Search Scopes:

11. Select "Display Group: Search Dropdown":

12. In the Scopes section of the Edit Scope Display Group tick the checkbox for the created scope and choose the position for this scope in the search dropdown. Press OK:

13. To test the work go to your custom search page, select the created scope in the search dropdown and try to search some data. Mine worked:

Enjoy. :)
Stay tuned for more: search results customization, custom managed properties and custom metadata property mappings for search.
Comments
Post a Comment