In this article I will demonstrate how to create InfoPath form and publish it to SharePoint Form Library using InfoPath 2007. It will illustrate the concept of InfoPath form customization and publishing and I will use the Form Library described in this post in later articles about search customization and workflow integration.
UPD: I have published an article about InfoPath 2010 and SharePoint 2010 to start illustrating new capabilities and benefits. It's here: InfoPath 2010 and SharePoint 2010 - Part 1
Scenario
We need an automated expense claim form for our organization, because currently all expense claims are paper-based and it's very ineffective and time-consuming to process expense claims. As a prerequisite I have created the Form Library called Expense Claims on my SharePoint Web site.
Solution
1. Start InfoPath 2007 and select Sample - Expense Report from the Customize a Sample dialog which appears upon the start:

In this scenario we will use predefined sample form, because it already has most of the data fields that used in many organizations. Therefore we can customize it according to our own needs rather than start from scratch.
2. Set up SharePoint form library connection to be able to publish our form template, to fill the form in browser and to submit the form.
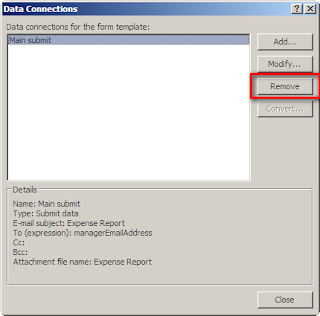
First we remove the existing Main data connection.
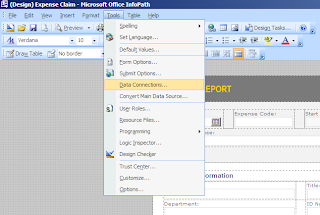
Go to Tools->Data Connections menu item:
Select Main submit connection and press Remove button:
Press Yes button when you see the notification dialog:

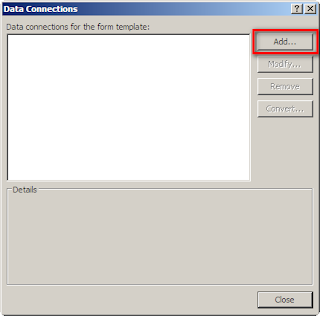
Press Add button to create new data connection:
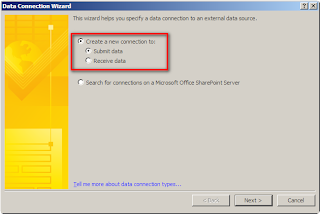
In the appeared Data Connection Wizard select Create a new connection to: -> Submit data and hit Next button:
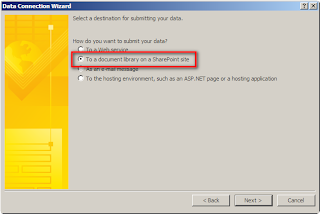
Select "To a document library on a SharePoint site" option for a destination and hit Next button:
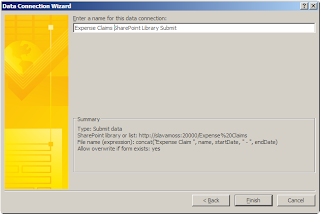
Specify a Document Library URL - in my case it is "http://your_server_name/Expense%20Claims" - and file name - I created a function to make it unique - a combination of user name, start and end dates. Tick the checkbox "Allow overwrite if file exists" and hit Next button:

Enter a name for this data connection and hit Finish button:
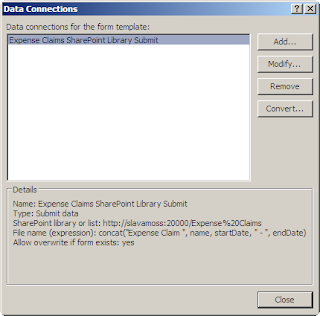
Close the data connections dialog:
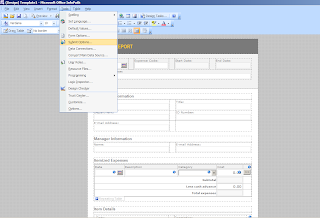
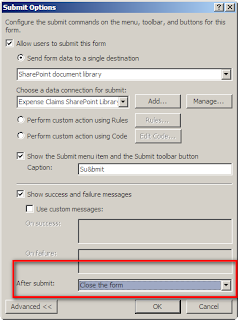
Go to Tools->Submit Options menu item:
Tick the checkbox "Allow users to submit this form", select "Send form data to a single destination" and select "SharePoint document library" option from the dropdown. Then select the SharePoint data connection we have just created:

Press Advanced button on the dialog and select "Close the form" in the "After submit:" dropdown. Then press OK button:
3. 100% of clients I worked with in regard to InfoPath forms needed current user's information automatically populated from SharePoint profile, SharePoint list or some other user information storage. The less effort way is to create a data connection in the form template to consume relevant SharePoint Web Services and then pull out necessary information from that data connection.
There are two great blog posts on the Web illustrating this method:
InfoPath - Get the current user without writing code
and
InfoPath – Get user information without writing code (extended)
We will use these two combined with some modifications which will allow us to remove some errors from the implementation.
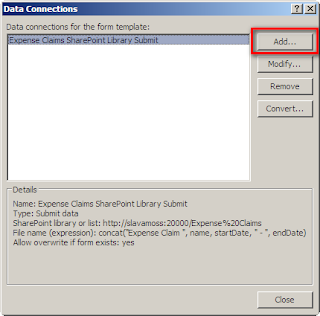
Choose Tools->Data Connections from menu:
Press Add button:
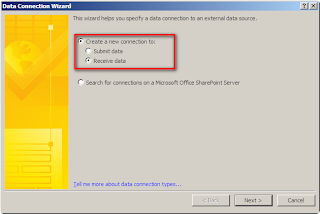
In the appeared Data Connection Wizard select Create a new connection to: -> Receive data and hit Next button:
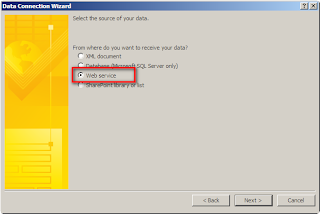
Select Web service as a source of data and hit Next button:
Specify the Web service URL as "http://your_server_name/_vti_bin/UserProfileService.asmx" and hit Next button:

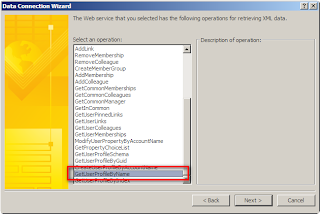
From the list of available operations select GetUserProfileByName and hit Next button:
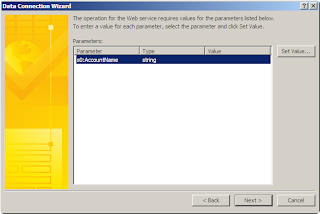
Leave everything as it is on the Web service parameter screen and hit Next button:
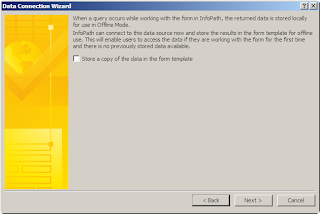
Leave everything as it is on the following screen and hit Next button:
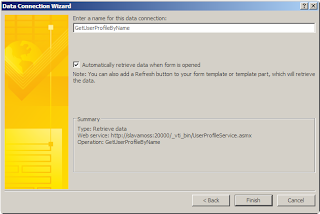
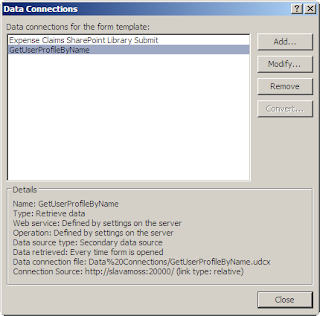
Set the name of the connection as GetUserProfileByName (leave default in this case) check that "Automatically retrieve data when form is opened" is ticked on and hit Finish button:
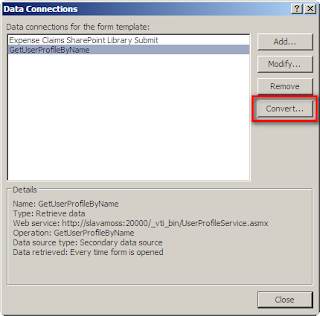
Our new connection should appear in the list of available connections. Now we have to convert the connection to be the UDC file. Hit Convert button:
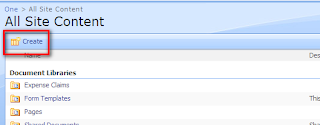
Before we continue we need to create Data Connection Library on our SharePoint Web site. Go to Create menu:
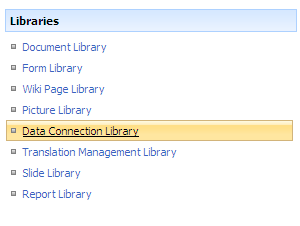
Select Data Connection Library from the list of available Libraries types:
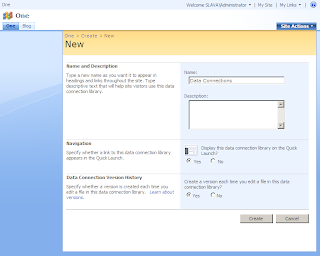
Provide name and description for the new Data Connection Library. I called it Data Connections for simplicity. Hit Create button:
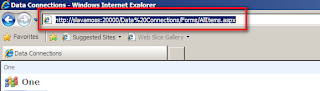
When the newly created library appears in the browser copy the URL from the address bar. In my case it is "http://your_server_name/Data%20Connections/":
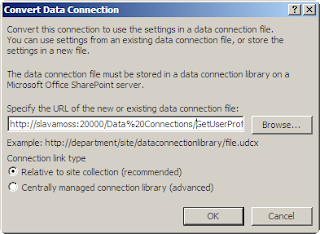
Return back to the data connection convert screen and paste the data connection library URL into the relevant text box then add GetUserProfileByName.udcx as file name. In my case it is "http://your_server_name/Data%20Connections/GetUserProfileByName.udcx". Set up the link type as "Relative to site collection (recommended)" and hit OK button:
Now we have got the connection ready to use in our form:
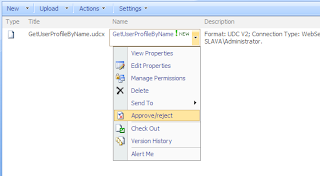
Return to the Data Connections library and have a look at the data connection file we have just created. It's status is Pending which means we have to approve it so everybody will be able to use it to fill the form:

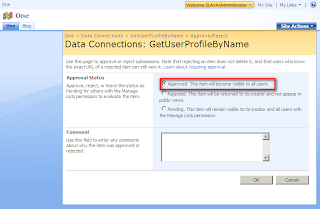
Select Approve/reject action from the item menu for our connection file:
Select Approved from the Approval Status options, add comment if necessary and hit OK button:
Go to Tools->Form Options in the menu:

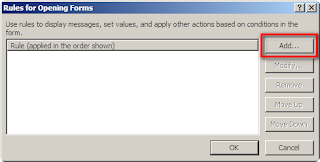
Select "Open and Save" category and hit "Rules" button:

Press Add button in the appeared dialog box:
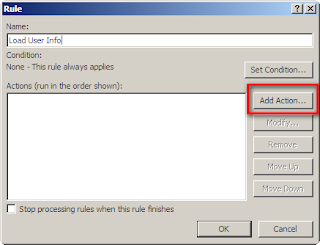
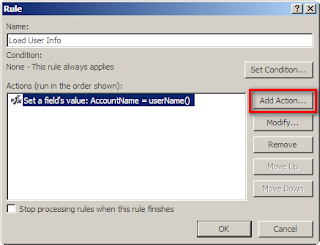
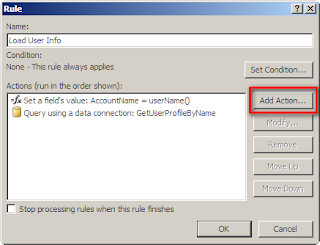
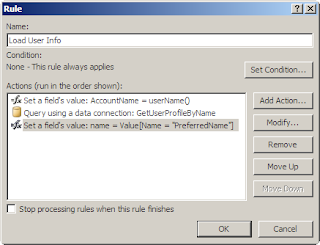
Provide the name for the new rule (Load User Info in my case) and hit Add Action button:
Press Select a field button:
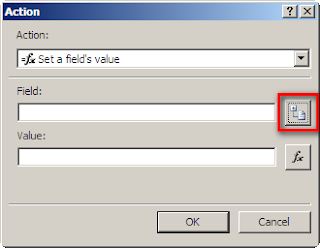
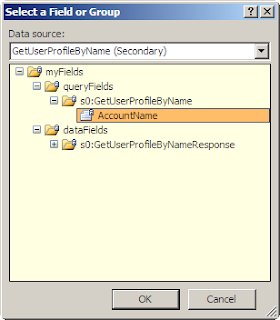
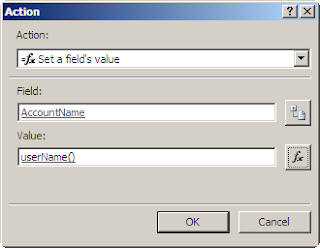
Select GetUserProfileByName data source and select AccountName from Query fields:
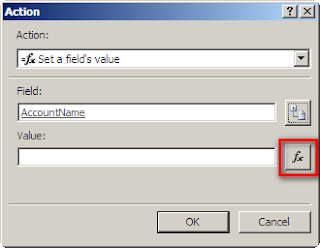
Press fx button near Value text box:
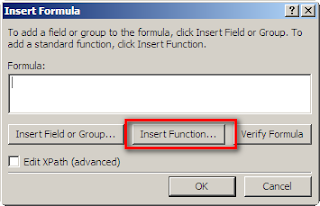
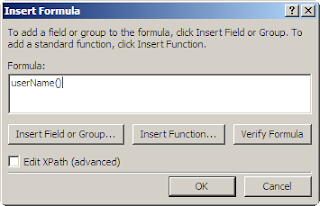
Hit Insert Function button in the Insert Formula dialog:
Select All from categories and function called userName:
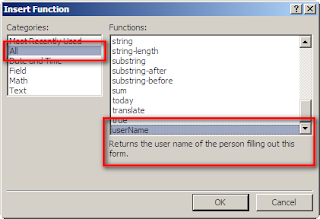
Formula userName() will appear. Hit OK button:
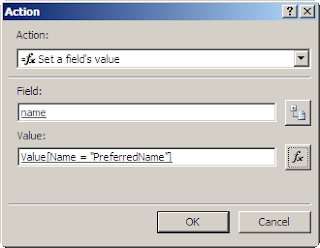
Action screen will come up with Field and Value set up. Click OK button:
On the Rule dialog we will see the first action added. Hit Add Action button again:
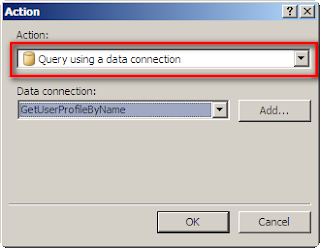
In the action dropdown choose "Query using a data connection" option and choose GetUserProfileByName data connection. Hit OK button:
Hit Add Action button again:
Press Select a field button:
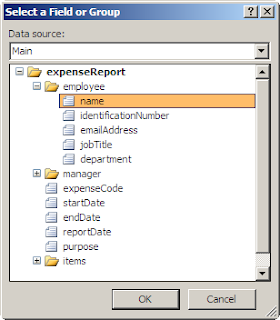
Select Main data source and select "name" field from the form template Data Source. Hit OK button:
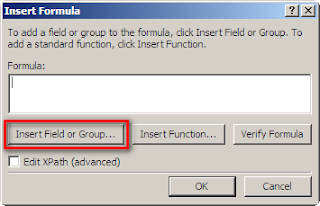
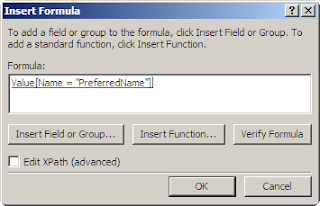
On the Insert Formula dialog press Insert Field or Group button:
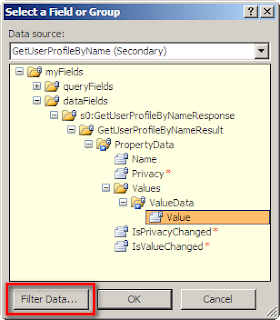
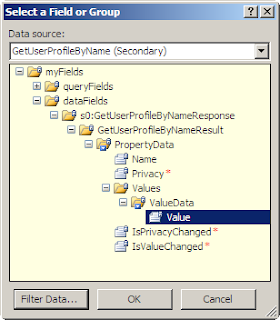
Select GetUserProfileByName data source, select Value from Data fields and hit Filter Data button:
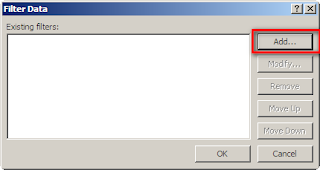
On the Filter Data dialog hit Add button:
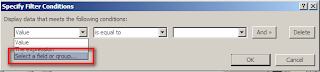
In the first dropdon select "Select field or group" option:
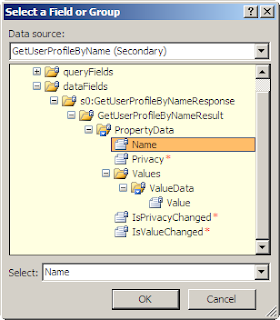
Select Name field from Data fields and click OK button:
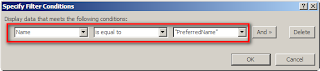
In the third dropdown (value) type the "PreferredName" text and hit OK button:
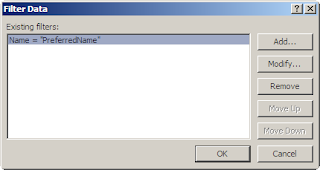
You will see the new filter in the list of filters. You can add as many filters as you like, but for this scenario I will leave only one. Click OK when finished:
Click OK on the Select Field or Group dialog to save changes:
Click OK on the Insert Formula dialog to save changes:
Click OK to save new action settings:
Click OK to save new rule:
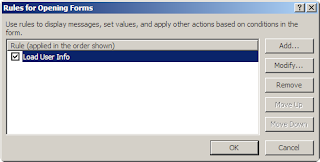
Click OK on the Rules for Opening Forms dialog:
4. Our form is ready to publish.
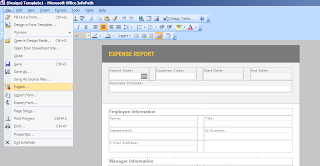
Go to File->Publish menu item:
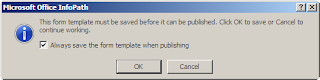
Tick "Always save the form template when publishing" checkbox and press OK button:
Select the first option and hit Next button:
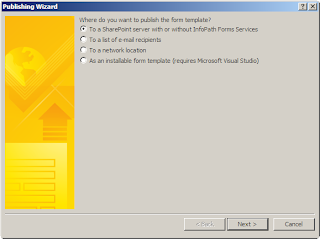
Enter the SharePoint Web site URL and hit Next button:

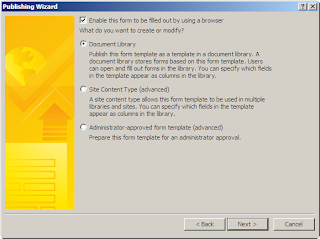
Tick "Enable this form to filled out by using a browser" checkbox, select Document Library option and press Next button:
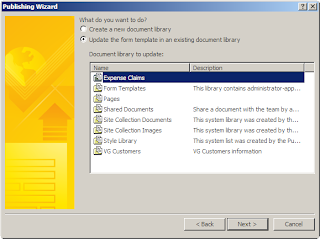
Select "Update the form template in an existing document library", select Expense Claim library and press Next button:
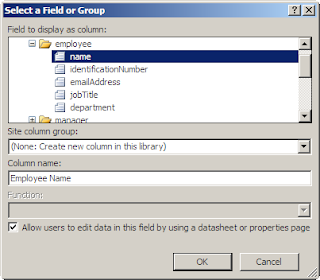
Press Add button to expose form template fields in SharePoint form library columns:
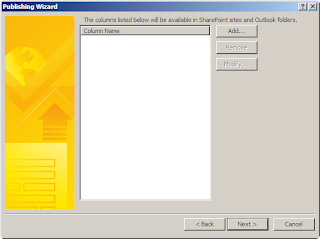
Select a field, specify whether you will use existing column or create new one and press OK button:
If you specified that you are going to edit form data from SharePoint you would get the following message:

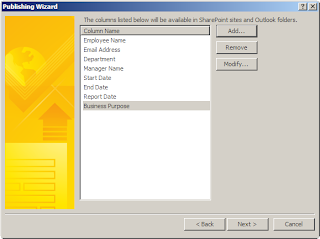
Do the same for all fields you want to add to SharePoint form library and then press Next button when finished:
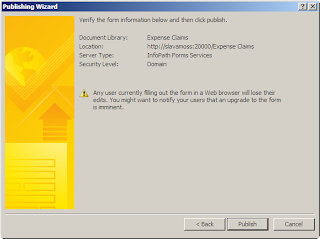
Press Publish button and wait until the process is completed:
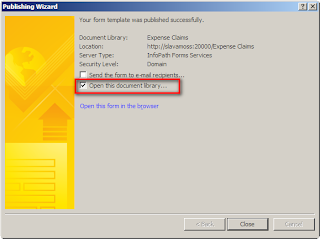
Tick the "Open this document library" checkbox and hit Close button:
When the form library appears go to Settings->Form Library Settings action in the library menu:
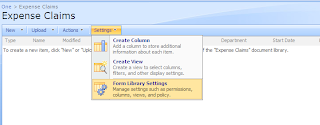
Select General settings->Advanced settings:
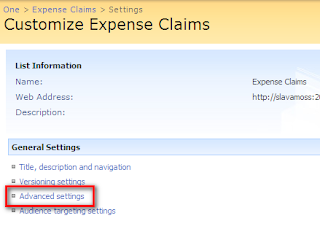
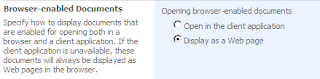
Select "Display as a Web page" option and press OK button:
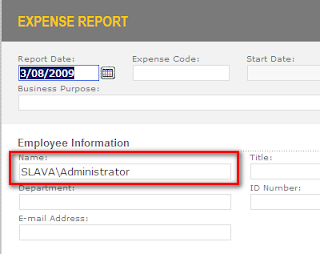
Create new form:

If you set up everything correct you will see that user information is automatically displayed on the form:
Submit couple of forms for test:

Enjoy :)
If you have any questions in regard to implementing InfoPath forms and automating business processes in your company or you need assistance contact us now for a consultation.
Stay tuned for more useful articles from Wylde Solutions
UPD: I have published an article about InfoPath 2010 and SharePoint 2010 to start illustrating new capabilities and benefits. It's here: InfoPath 2010 and SharePoint 2010 - Part 1
Scenario
We need an automated expense claim form for our organization, because currently all expense claims are paper-based and it's very ineffective and time-consuming to process expense claims. As a prerequisite I have created the Form Library called Expense Claims on my SharePoint Web site.
Solution
1. Start InfoPath 2007 and select Sample - Expense Report from the Customize a Sample dialog which appears upon the start:

In this scenario we will use predefined sample form, because it already has most of the data fields that used in many organizations. Therefore we can customize it according to our own needs rather than start from scratch.
2. Set up SharePoint form library connection to be able to publish our form template, to fill the form in browser and to submit the form.
First we remove the existing Main data connection.
Go to Tools->Data Connections menu item:

Select Main submit connection and press Remove button:

Press Yes button when you see the notification dialog:

Press Add button to create new data connection:

In the appeared Data Connection Wizard select Create a new connection to: -> Submit data and hit Next button:

Select "To a document library on a SharePoint site" option for a destination and hit Next button:

Specify a Document Library URL - in my case it is "http://your_server_name/Expense%20Claims" - and file name - I created a function to make it unique - a combination of user name, start and end dates. Tick the checkbox "Allow overwrite if file exists" and hit Next button:

Enter a name for this data connection and hit Finish button:

Close the data connections dialog:

Go to Tools->Submit Options menu item:

Tick the checkbox "Allow users to submit this form", select "Send form data to a single destination" and select "SharePoint document library" option from the dropdown. Then select the SharePoint data connection we have just created:

Press Advanced button on the dialog and select "Close the form" in the "After submit:" dropdown. Then press OK button:

3. 100% of clients I worked with in regard to InfoPath forms needed current user's information automatically populated from SharePoint profile, SharePoint list or some other user information storage. The less effort way is to create a data connection in the form template to consume relevant SharePoint Web Services and then pull out necessary information from that data connection.
There are two great blog posts on the Web illustrating this method:
InfoPath - Get the current user without writing code
and
InfoPath – Get user information without writing code (extended)
We will use these two combined with some modifications which will allow us to remove some errors from the implementation.
Choose Tools->Data Connections from menu:
Press Add button:

In the appeared Data Connection Wizard select Create a new connection to: -> Receive data and hit Next button:

Select Web service as a source of data and hit Next button:

Specify the Web service URL as "http://your_server_name/_vti_bin/UserProfileService.asmx" and hit Next button:

From the list of available operations select GetUserProfileByName and hit Next button:

Leave everything as it is on the Web service parameter screen and hit Next button:

Leave everything as it is on the following screen and hit Next button:

Set the name of the connection as GetUserProfileByName (leave default in this case) check that "Automatically retrieve data when form is opened" is ticked on and hit Finish button:

Our new connection should appear in the list of available connections. Now we have to convert the connection to be the UDC file. Hit Convert button:

Before we continue we need to create Data Connection Library on our SharePoint Web site. Go to Create menu:

Select Data Connection Library from the list of available Libraries types:

Provide name and description for the new Data Connection Library. I called it Data Connections for simplicity. Hit Create button:

When the newly created library appears in the browser copy the URL from the address bar. In my case it is "http://your_server_name/Data%20Connections/":

Return back to the data connection convert screen and paste the data connection library URL into the relevant text box then add GetUserProfileByName.udcx as file name. In my case it is "http://your_server_name/Data%20Connections/GetUserProfileByName.udcx". Set up the link type as "Relative to site collection (recommended)" and hit OK button:

Now we have got the connection ready to use in our form:

Return to the Data Connections library and have a look at the data connection file we have just created. It's status is Pending which means we have to approve it so everybody will be able to use it to fill the form:

Select Approve/reject action from the item menu for our connection file:

Select Approved from the Approval Status options, add comment if necessary and hit OK button:

Go to Tools->Form Options in the menu:

Select "Open and Save" category and hit "Rules" button:

Press Add button in the appeared dialog box:

Provide the name for the new rule (Load User Info in my case) and hit Add Action button:

Press Select a field button:

Select GetUserProfileByName data source and select AccountName from Query fields:

Press fx button near Value text box:

Hit Insert Function button in the Insert Formula dialog:

Select All from categories and function called userName:

Formula userName() will appear. Hit OK button:

Action screen will come up with Field and Value set up. Click OK button:

On the Rule dialog we will see the first action added. Hit Add Action button again:

In the action dropdown choose "Query using a data connection" option and choose GetUserProfileByName data connection. Hit OK button:

Hit Add Action button again:

Press Select a field button:
Select Main data source and select "name" field from the form template Data Source. Hit OK button:

On the Insert Formula dialog press Insert Field or Group button:

Select GetUserProfileByName data source, select Value from Data fields and hit Filter Data button:

On the Filter Data dialog hit Add button:

In the first dropdon select "Select field or group" option:

Select Name field from Data fields and click OK button:

In the third dropdown (value) type the "PreferredName" text and hit OK button:

You will see the new filter in the list of filters. You can add as many filters as you like, but for this scenario I will leave only one. Click OK when finished:

Click OK on the Select Field or Group dialog to save changes:

Click OK on the Insert Formula dialog to save changes:

Click OK to save new action settings:

Click OK to save new rule:

Click OK on the Rules for Opening Forms dialog:

4. Our form is ready to publish.
Go to File->Publish menu item:

Tick "Always save the form template when publishing" checkbox and press OK button:

Select the first option and hit Next button:

Enter the SharePoint Web site URL and hit Next button:

Tick "Enable this form to filled out by using a browser" checkbox, select Document Library option and press Next button:

Select "Update the form template in an existing document library", select Expense Claim library and press Next button:

Press Add button to expose form template fields in SharePoint form library columns:

Select a field, specify whether you will use existing column or create new one and press OK button:

If you specified that you are going to edit form data from SharePoint you would get the following message:

Do the same for all fields you want to add to SharePoint form library and then press Next button when finished:

Press Publish button and wait until the process is completed:

Tick the "Open this document library" checkbox and hit Close button:

When the form library appears go to Settings->Form Library Settings action in the library menu:

Select General settings->Advanced settings:

Select "Display as a Web page" option and press OK button:

Create new form:

If you set up everything correct you will see that user information is automatically displayed on the form:

Submit couple of forms for test:

Enjoy :)
If you have any questions in regard to implementing InfoPath forms and automating business processes in your company or you need assistance contact us now for a consultation.
Stay tuned for more useful articles from Wylde Solutions
I am stuck. I have tried this and scoured the net to find an answer to the error of "Attempted to perform an unauthorized operation". Whenever the form tries to perform the query, I get this error. I have checked permissions, disabled anonymous access to the site via IIS Manager, and everything else I can think of. Can anyone please provide some insight into this? Email me at mwestling at N2Holdings dot com.
ReplyDeleteI want to create a KPI by showing all the data which is there in infopath
ReplyDelete